Posts is a very flexible module that allows schools to manage news, blogs and other dynamic content. While this flexibility lets schools do a lot of cool things, and has numerous built-in features to take your content strategy to the next level, it can also make the initial setup feel a bit overwhelming.
With that in mind, here are a few best practice examples to get you started:
Stay Organized with Folders and Be in Control of Permissions
The Posts module makes it very easy for site admins to get members of the community involved in generating content. Empowering more people to contribute content will lead to a more vital, interesting, engaging website - as there will be more new content for all of your different constituents to consume on a regular basis. That being said, there needs to remain some control over who is contributing, and where.
As you begin to add these blogs to your site, it's best to think how you would answer the follow questions, so that you can setup your boards in the best possible way:
- Who will be blogging, and how often?
- Would you like multiple "bloggers" to contribute to a single blog, will each blogger have his or her own blog, or a combination of the two.
To clarify, let's say for example, you school would like to start with the following blogs:
- Head of School Blog
- Student profiles blogs (6 blogs)
- Teacher blogs (50 blogs)
- Travel blog
To organize this content, each blog will have it's own board. A board allows you to organize related posts in one place. You can also add permissions to decide who can contribute posts to each board, and what level of rights they have (e.g., whether they can publish or not).
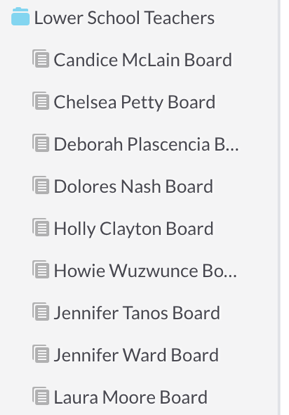
Depending on the number of blogs, you may want to organize them all in one "school blogs" folder; in the case of teacher blogs, you may want to add these to their own folder, as there will be so many. You can always move them later, so if you start with a few blogs, and then add more over time — no problem!
One key consideration is to think about whether you will be presenting a group of boards together using the board directory element. In that case, those boards should all live in one folder.
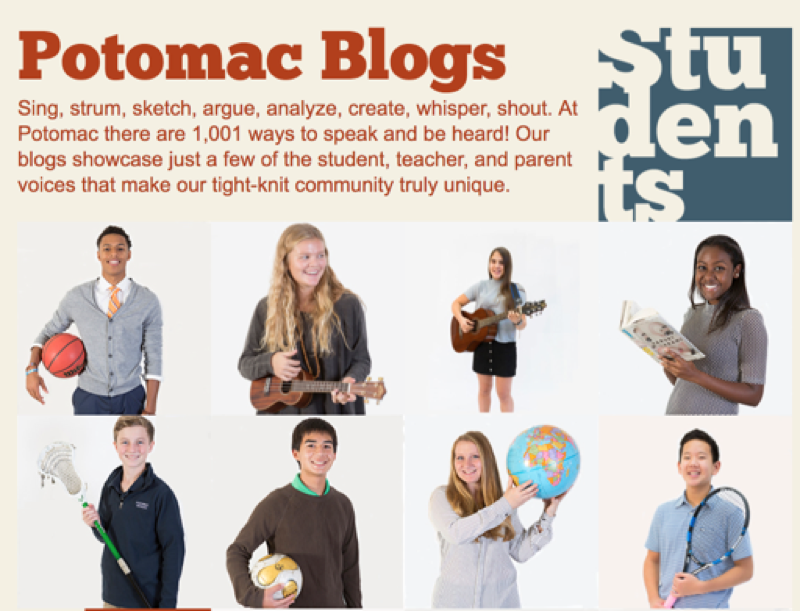
Here is a presentation of multiple student blogs in one 'board' element; each student picture represents a different Board in the 'student blog' folder:
Once you've created your board, add a user (or users) to administer them. These users are constituents from Constituent Manager - they will not need site admin accounts.
There are 3 levels of permissions:
- Board admin (100% control over ALL posts)
- View/edit/publish/delete, and
- View/edit/delete.
All users can 'tag' posts, but only board admins can create/manage categories.
Populate Board Descriptions & Thumbnails
Now that you have your boards and folders created, two more important settings you can set for a board are the Description and Thumbnail. When these fields are populated in the Board Settings modal, you can display in a little more about the board/blog.
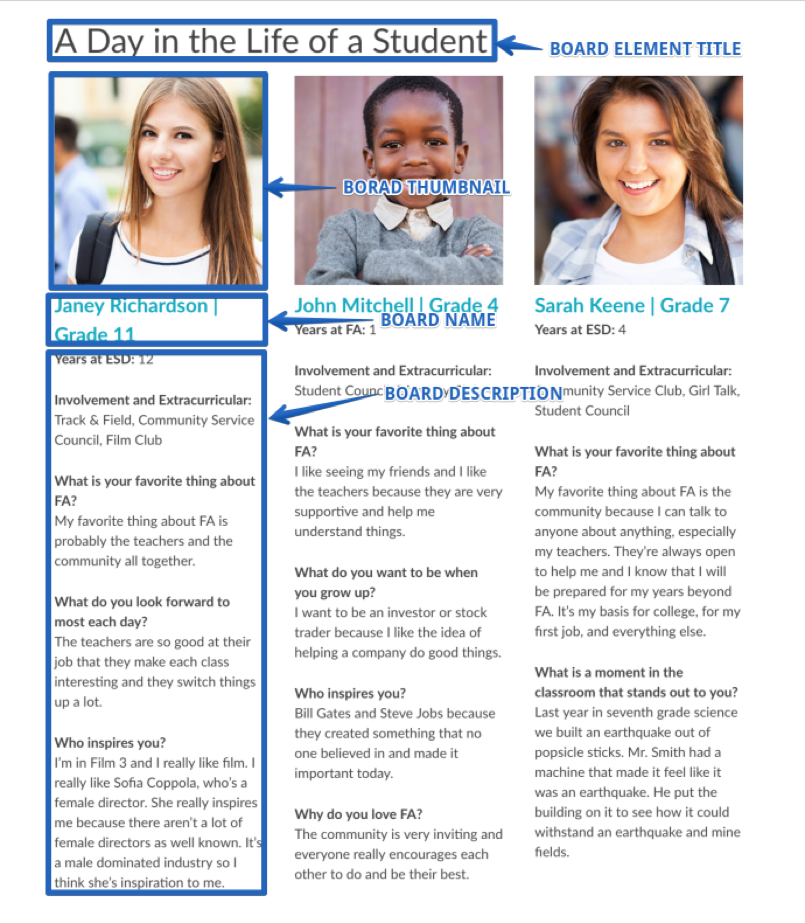
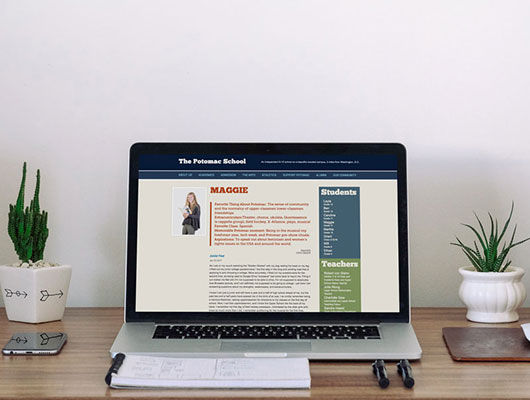
For example, let's say you have a folder of student blogs you use for the "A Day in the Life of a Student" page under your Admissions section. Use the Description field to create a type of bio for the student, and then use the Thumbnail for the board to add a fun picture of that student.
PRO TIP
Create a photoshop file with the exact dimensions of the post thumbnail to ensure every image is the exact same size, without cropping.
Set a Default Board Post Page
In keeping with the Board Settings modal, let's take a look at another best practice: Default Board Post Page. While this is not a required setting (yet), it is one that controls the availability of several awesome Post features. When a Default Board Post Page is set, you will gain access to:
- Previewing a Post before/after it has been published straight from the Post edit screen
- Allow the Board to have an RSS feed
- Allow the Board to have email subscriptions for Alerts
- Tells your eNotice where to open the posts when clicked in your email
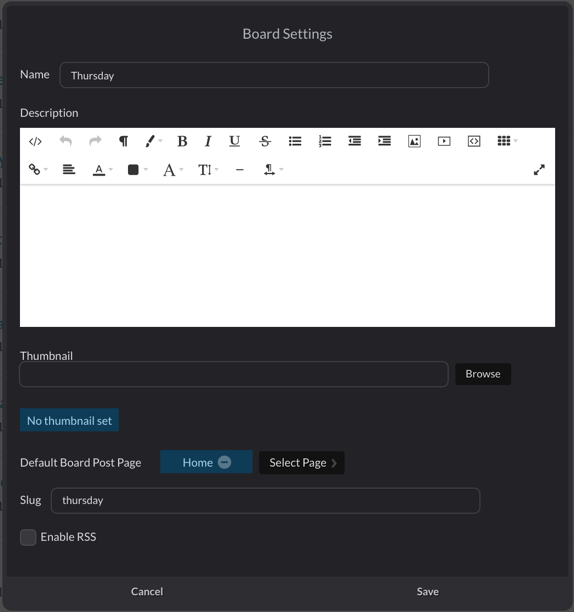
Don't pick just any page. Be sure to pick a page that you have setup to have a Post (Single subtype) element on it.
Populate the Post Summary
It may feel like a little extra work to add a few sentences in the Summary field for each post, but it will be worth it to you users! Not only can the Summary be displayed as a sweet little teaser on your pages, but it is also the teaser that is used in RSS feeds and email alerts! So, take a few extra minutes to add a sentence or two here, and help to entice your readers to click to read more!
ABOUT THE AUTHOR

Daisey first worked with Finalsite as a client for more than a decade before joining the team in 2007. As Product Manager, Daisey is a pro in all things Finalsite-related. She currently resides in Utah, loves helping clients, and serving as our popular FinalsiteU MC.


